> For the complete documentation index, see [llms.txt](https://docs.mywish.io/mywish/llms.txt). Markdown versions of documentation pages are available by appending `.md` to page URLs; this page is available as [Markdown](https://docs.mywish.io/mywish/how-to-create-a-trc20-token-on-tron-blockchain.md).
# How to create a TRC20 token on Tron Blockchain
1. **Enter** [**https://contracts.mywish.io**](https://contracts.mywish.io/create)

**2. Choose Blockchain: Tron**

**3. Turn the testnet mode, if you want to deploy a contract to testnet first.** Token contracts deployment to testnet is free of charge
**3. Click on the selected contract to go to the contract creation form.**

\
**5. Customize token parametres:**
* Enter Token name, for example, MY PROJECT TOKEN
* Specify the token symbol. This is usually a short name or abbreviation, such as MPT
* Specify Decimals. The number of decimal places after the decimal point.
* For example, USD has 2 decimals. Decimals 6 is a common practice.

\
**5. Enter the Token owner address.**
You must specify the address from which you have a private key. We recommend using addresses from Metamask.
Using addresses from Trustwallet is also acceptable as they provide private keys to addresses.
**Important!**
Do not use the addresses you received on the Exchanges or in crypto wallets if you are not sure that they provide you with a private key. Otherwise, you will not be able to manage the contract and will lose tokens.Click Mint tokens to create a Total supply.

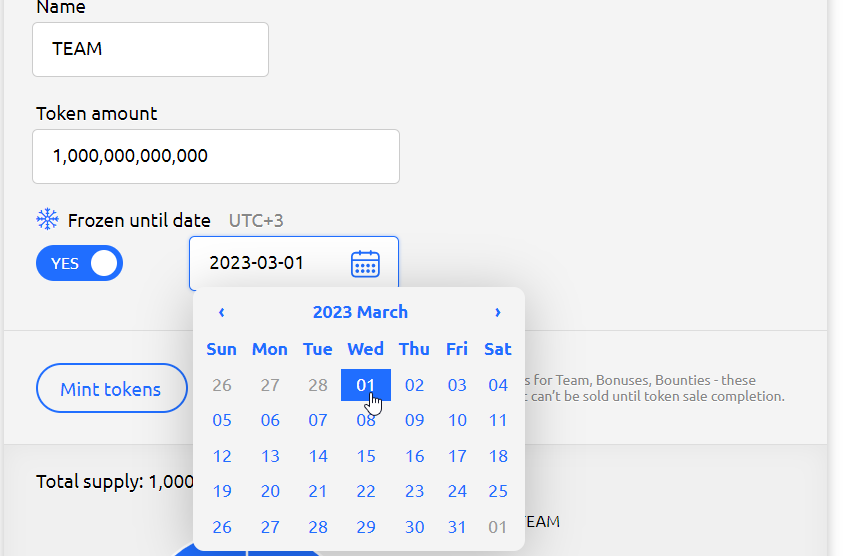
**6. Define Minting Details:**
* Specify the address to which you want to send tokens
* Enter any address name (optional)
* Specify the number of tokens

**You can specify up to 5 addresses in order to perform premint tokens** to addresses for example (for TEAM, Advisors, Bounty, Marketing etc.) The recipients of tokens must have private keys from these addresses.
**Possible options for freezing tokens until a specified date.** For example, if your tokenomics suggests locking command tokens for a certain period. After reaching the specified date, the token holder or token owner must call the defrost function in order to be able to transfer tokens.
**7. After filling out the form, press the CREATE button to save the contract form.**
If you want your contract code to be published by the platform, we recommend choosing a verification service. (only available on the Mainnet)

**Your contract status is now Created. You can check all the conditions that were previously entered and make sure everything is in order.**
**8. Press the Edit button**
If you decide to change any of the clauses of the contract, since after starting the conditions it will not be possible to change.

**9. Click the Launch button**
If you are ready to deploy the contract. (When creating a contract on the Mainnet, you will need to top up the balance on the platform in the Buy tokens tab. In the test network, creating contracts is free.)
After the contract is deployed, its status will be Active.
**10. Manage your token contract in MyWish interface**
**- Mint**
You can mint more tokens if required (with or without freezing)
**- Finalize**
If you have created a sufficient number of tokens in accordance with your tokenomics and you are sure that you do not need anymore, then call the Finalize function to disable the possibility of minting in the future.
## **Start creating your token now at:** [**https://contracts.mywish.io**](https://contracts.mywish.io/contracts)
## **Watch our tutorial about how to create a Tron based token contract:**
{% embed url="" %}